
Spring Security is OSS framework for application-level authentication and authorization, which supports common standards and protocols. We will walk you through adding Spring Security to an existing application, by explaining what happens when you first add the dependencies, what to do next, and how to fix your tests.
In this post, I would like to show you the complete process of implementing Spring Security elements in our application. I decided that we would try to map the situation from a normal business situation – first we will build applications based on the outdated way using the WebAdapter class, and then we will try to refactor our redundant code to the new version of user authorization introduced and proposed a few months ago by the Spring developers.
Let’s assume that a client who has an application written by another team approached us. We got a proposal from him to add the authorization functionality of our website, to limit access to resources, so that only his users can use it, which will finally allow him to earn money from his customers.
The application is quite simple. The user wants to store information about his meals in such a way that he can keep statistics of his nutrition and maintain a diet.
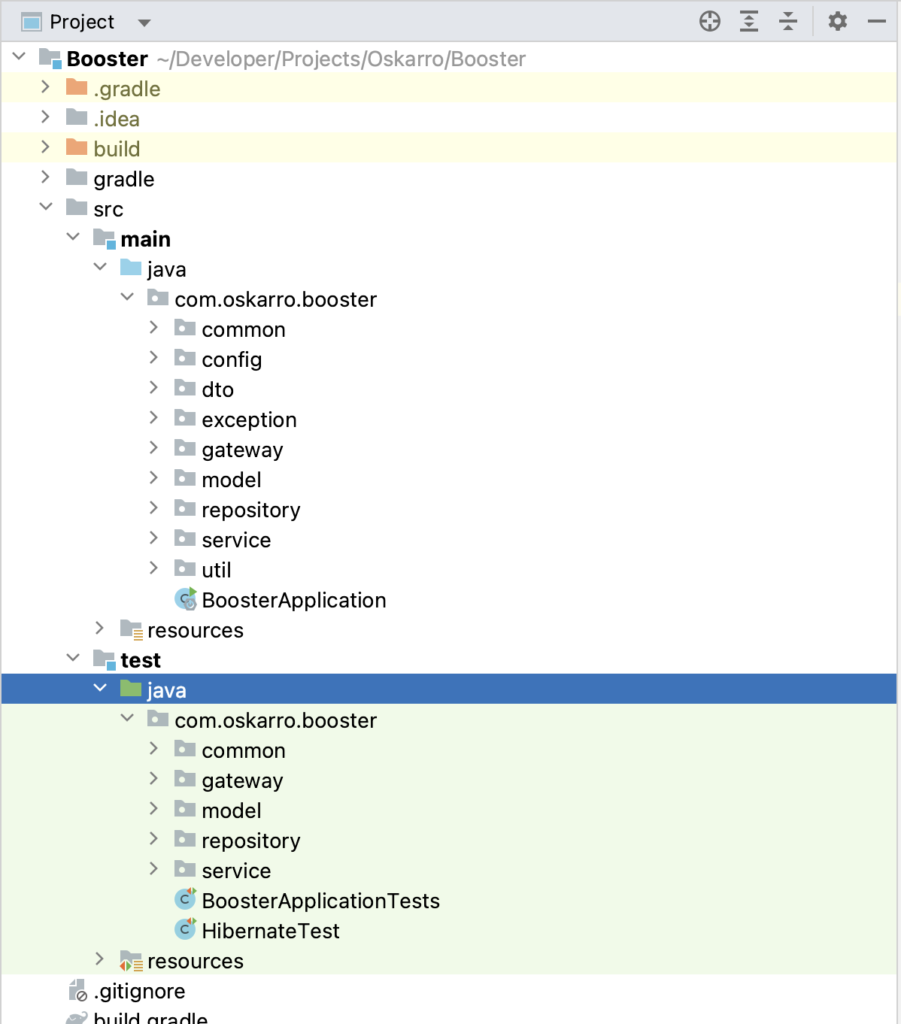
First, let’s check the operation of the application at this point. Let’s assume that data should be read by every user, while their modification requires having special permissions by the user concerned. So let’s check the four basic methods by satisfying the CRUD.
GET all products:
REQUEST:
GET: http://localhost:8080/api/product
RESPONSE:
{
    "content": [
        {
            "id": 1,
            "name": "Yoghurt",
            "energy": 112,
            "protein": 3.2,
            "fat": 10.2,
            "carbs": 40.5,
            "price": 10.2,
            "provider": 1,
            "meals": []
        },
        {
            "id": 2,
            "name": "Milk",
            "energy": 112,
            "protein": 13.2,
            "fat": 4.4,
            "carbs": 20.5,
            "price": 1.2,
            "provider": 2,
            "meals": []
        }
    ]
}
GET one product by id:
REQUEST:
http://localhost:8080/api/product/:productId
RESPONSE:
{
    "id": 1,
    "name": "Yoghurt",
    "energy": 112,
    "protein": 3.2,
    "fat": 10.2,
    "carbs": 40.5,
    "price": 10.2,
    "provider": 1,
    "meals": []
}
Before starting programming, it is worth finding out to the client how he would like to protect his application. Regardless of the method he proposes (eg OAuth2 or JWT), I always start writing the code with the basic and at the same time default authorization of requests with a username and password. Spring Security is really just a bunch of filters that help you add authentication and authorization methods to our system.
For many programmers, the term Servlet seems a bit out of date. I have to tell you that even in Spring (the newest one!) We can find many components that use this contraption. A special type of such Servlet is DispatcherServlet, which enables the processing of all incoming requests from the user. From a developer point of view, Servlet takes care of redirecting incoming HTTP requests (e.g. from Postman or the browser) to the input gateway in your application. In Spring, such gateways are control classes marked with Controller or RestController annotations. If you have written similar applications before, you should know that the authorization configuration does not take place inside the controllers, because there we delegate received requests to the appropriate services. Therefore, it points out here that authentication and authorization should be performed before the request lands in the controller zone.
Before we start dealing with the actual code, I would like to mention that the native code provider, i.e. Oracle, also provides filter instances in its libraries (javax.servlet.http.HttpFilter). We can understand them as components that are configured and used in the realm of the application server or container (eg Tomcat) to filter all incoming HTTP requests. However, we will not deal with this version here, because as your application grows in size, it can be very difficult to maintain (huge filter with lots of logic).
Spring framework’s maker did in a more convenient way – one main filter has been splitted into a lot of smaller multiple filters which we could use together. All filters are checked one by one to verify eligibility. This method is called FilterChain. Such a chain of checks can deal with any authentication or authorization problem. The filters proposed by Spring are quite a big topic that I could devote a separate blog post to. Briefly below, I am sending you the most frequently used items. If you want to get to know it a little deeper, I recommend checking the code here.
FilterChain filters:
– BasicAuthenticationFilter
– UsernamePasswordAuthenticationFilter
– DefaultLoginPageGeneratingFilter

To make it easier for you to understand the problem, I decided to add an old authorization version to my application, which uses WebSecurityConfigurerAdapter, and then we will try to update it together to the latest version proposed by Spring’s developers.
WebSecurityConfigurerAdapter
The first step in adding security to our application is picking the right dependency to add to our project. However, even figuring out which dependency to add can be difficult these days! Looking at start.spring.io we can see there are already 5 different dependencies related to Spring Security.
<dependency>
    <groupId>org.springframework.security</groupId>
    <artifactId>spring-security-config</artifactId>
    <version>5.7.5</version>
</dependency>
implementation group: 'org.springframework.security', name: 'spring-security-config', version: '5.7.5'The deprecated way of handling authorization and authentication in Spring Security consists in creating and configuring a class that must be marked with the @EnableWebSecurity and @Configuration annotations and extend the WebSecurityConfigurerAdapter class listed in the Spring library, which basically offers you a configuration DSL/methods.
@Configuration // (1)
@EnableWebSecurity // (2)
public class SecurityConfiguration extends WebSecurityConfigurerAdapter { // (3)

    @Override
    protected void configure(HttpSecurity httpSecurity) throws Exception { // (4)
        httpSecurity
                .authorizeRequests()
                    .antMatchers("/", "/index").permitAll() // (5)
                    .anyRequest().authenticated() // (6)
                .and()
                    .formLogin() // (7)
                    .loginPage("/login").permitAll() // (7)
                .and()
                    .logout().permitAll() // (8)
                .and()
                    .httpBasic(); // (9)

        httpSecurity.csrf().disable(); // (10)
        httpSecurity.headers().frameOptions().disable(); // (11)
    }
}- @Configuration annotation
- @EnableWebSecurity annotation allows Spring to find and automatically apply the class to the global Web Security.
- Extending class with WebSecurityConfigurerAdapter class – Provides a convenient base class for creating a
WebSecurityConfigurerinstance. The implementation allows customization by overriding methods. - Thanks to overriding the adapter’s configure(HttpSecurity httpSecurity) method, you get a nice little DSL with which you can configure your FilterChain. This method tells Spring Security:
- how to configure CORS and CSRF,
- when require all users to be authenticated or not
- which filter and when should work
- which exception handler is chosen
- Config authorization requests which is mapping matches URLs (more info here). All requests going to
/and/indexare allowed (permitted) – the user does not have to authenticate. - Any other request needs the user to be authenticated first, i.e. the user needs to login.
- Allows access to form login (username/password in a form)
- Allows access to logout
- On top of that, you are also allowing Basic Auth
- Disable CSRF protection
- Disable X-Frame-Options in Spring Security
One important thing – even if you extend your class like I did above, you don’t even need to overwrite configure(HttpSecurity httpSecurity) with your solution, because Spring provides us with a default implementation of this method, which you can see below.
public abstract class WebSecurityConfigurerAdapter implements WebSecurityConfigurer<WebSecurity> {

    protected void configure(HttpSecurity http) throws Exception {
            http
                .authorizeRequests()
                    .anyRequest().authenticated()
                .and()
                    .formLogin()
                .and()
                    .httpBasic();
        }
}
The application that I have been creating so far was only to perform its business logic without any additional security and without user verification. Now, in order to perform authorization operations, a reference point will be needed – in our case, it will be the instance of the current user. Of course, this can be done via an external website, but we will use the basic and most popular (also the default) authorization method here. So we are gonna have 3 new classes and 3 new tables in database with many-to-many relationships. Below you can find defined entities:
public enum UserRole {
    ROLE_READ,
    ROLE_WRITE,
    ROLE_ADMIN
}
A role is an authority with a ROLE_ prefix. So a role called ADMIN is the same as an authority called ROLE_ADMIN., while an authority is a just a string. Thanks to that we will be keeping all authorities information in database.
@Getter
@Setter
@AllArgsConstructor
@NoArgsConstructor
@Entity
public class Role implements Serializable, BaseEntity<Role, Integer> {

    @Id
    @GeneratedValue(strategy = GenerationType.IDENTITY)
    private Integer id;

    @Enumerated(EnumType.STRING)
    @Column(length = 20)
    private UserRole name;

    public Role(UserRole name) {
        this.name = name;
    }

    @Override
    public void update(Role source) {

    }

    @Override
    public Role createNewInstance() {
        Role newInstance = new Role();
        newInstance.update(this);
        return newInstance;
    }
}
@Getter
@Setter
@Entity
@Builder
@AllArgsConstructor
@NoArgsConstructor
public class UserMan implements Serializable, BaseEntity<UserMan, Integer> {
@Id
@GeneratedValue(strategy = GenerationType.IDENTITY)
private Integer id;
@NotBlank
@Size(max = 20)
private String username;
@NotBlank
@Size(max = 120)
private String password;
@ManyToMany(fetch = FetchType.LAZY)
@JoinTable(name = "user_roles",
joinColumns = @JoinColumn(name = "userman_id"),
inverseJoinColumns = @JoinColumn(name = "role_id"))
private Set<Role> roles = new HashSet<>();
@Override
public void update(UserMan source) {
}
@Override
public User createNewInstance() {
User newInstance = new User();
newInstance.update(this);
return newInstance;
}
}
It would be good to add conditions protecting against username duplication or security conditions for password complexity, but in order to focus on authorization, I only mention these aspects. In addition to the user model itself and its bindings, we also need logic in the code – I added repositories for extracting information about users. I had to name this class UserMan, because in my case with embedded database – „User” word is the keyword in the newer versions of H2 client.
If you use the built-in database (instead of an external client), you will also need validation of authorization at the WebSecurity level. (e.g. H2 has a browser accessible console). It is a convenient way to view the tables created by Hibernate and run queries against the in memory database. Here is an example of the H2 database console.
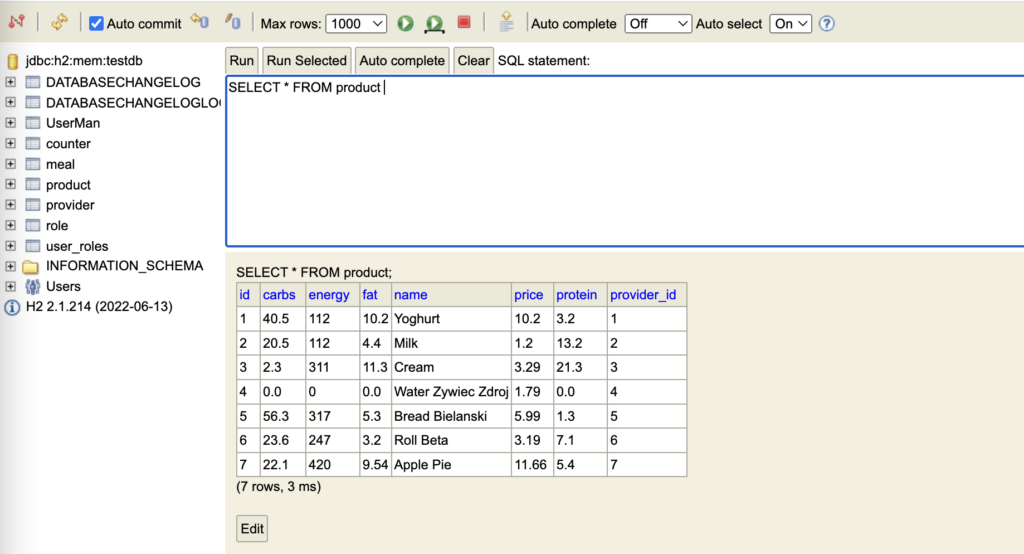
Spring Security requires an implementation of UserDetails interface to know about the authenticated user information, so we create the Principal class as below. You can see, this class wraps an instance of UserMan class and delegates almost overriding methods to the User’s ones. UserDetails has even more methods, like is the account active or blocked, have the credentials expired or what permissions the user has, but I have omitted them in the following snippet for ease.
@EqualsAndHashCode
public class Principal implements UserDetails {

    @Serial
    private static final long serialVersionUID = 1L;

    private final UserMan userMan;

    private Collection<? extends GrantedAuthority> authorities;

    public Principal(UserMan user, Collection<? extends GrantedAuthority> authorities) {
        this.userMan = user;
        this.authorities = authorities;
    }

    public Principal(UserMan user) {
        this.userMan = user;
    }

    public static Principal build(UserMan userMan) {
        List<GrantedAuthority> authorities = userMan
                .getRoles()
                .stream()
                .map(role -> new SimpleGrantedAuthority(role.getName().name()))
                .collect(Collectors.toList());
        return new Principal(userMan, authorities);
    }

    @Override
    public Collection<? extends GrantedAuthority> getAuthorities() {
        Set<Role> roles = userMan.getRoles();
        List<SimpleGrantedAuthority> authorities = new ArrayList<>();
        for (Role role: roles) {
            authorities.add(new SimpleGrantedAuthority(role.getName().name()));
        }
        return authorities;
    }

    // Other mandatory functions has been omitted

}
The UserDetailsService interface is used to retrieve user-related data. It has one method named loadUserByUsername() which can be overridden to customize the process of finding the user.
@Service
@AllArgsConstructor
public class SlykoUserDetailsService implements UserDetailsService {

    private final UserRepository userRepository;

    @Override
    @Transactional
    public UserDetails loadUserByUsername(String username) throws UsernameNotFoundException {
        return Principal.build(userRepository.findByUsername(username));
    }    public UserDetails loadUserByUsername(String username) throws UsernameNotFoundException {
        UserMan user = userRepository.findByUsername(username);
        if (user == null) {
            throw new UsernameNotFoundException(username);
        }
        return Principal.build(user);
    }
}
One main function loads the user entity from existing database table by username. If not found then it throws UsernameNotFoundException. If the authentication process is successful, we can get User’s information such as username, password, authorities from an Authentication object. In the code fragment above we fetch UserMan using repository class and build Principal object.
Now that we’ve implemented the basic authorization method, we can try to test our code. First, let’s import some sample data – I’ll use a simple ObjectMapper function from an external library, which will download a json file and load it into the database. I’ve passed {noop} prefix before each password on json file because I wanna to pass plain string (without executing any hash operations). It is not intended for production and instead we recommend hashing your passwords externally.
    public void loadDataFromJsonToDatabase(Resource resource, TypeReference<List<T>> typeReference) {
        try (InputStream inputStream = resource.getInputStream()) {
            List<T> entities = mapper.readValue(inputStream, typeReference);
            saveAll(entities);
        } catch (IOException e) {
            System.out.printf("Could not save entity in database: %s", e);
            throw new RuntimeException(e);
        }
    }
[
{
"username": "UserReadOnly",
"password": "{noop}123456"
},
{
"username": "UserWriteOnly",
"password": "{noop}123456"
},
{
"username": "Admin",
"password": "{noop}123456"
}
]Now you can try to extract data for any product or a whole list of products using the API. You can change, add or remove individual endpoints from the configure method of the SecurityConfiguration class to make sure everything is working properly on your machine.
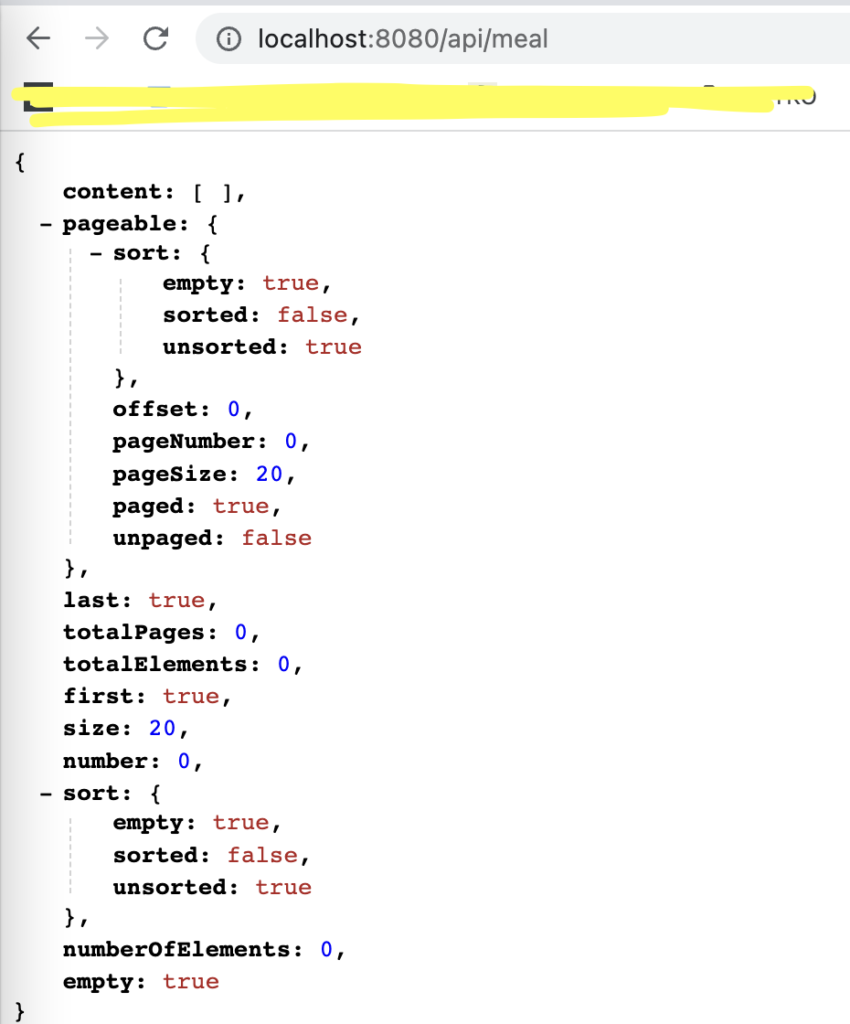

We already have prepared users and their respective roles. After adding the relations between the objects and saving them in the database, we can finally go to the stage of configuring the adapter in the configuration class. The previously declared user roles will now allow us to grant appropriate permissions to individual groups. It’s just never worth giving ordinary users access to all the options on the site.
First, let’s establish our strategy:
- a normal user can only view some data from our database using our API
- a special user can view and edit some data in our database
- the administrator has access to all data and has the ability to modify all data.
Before changing the code in the SecurityConfiguration class, we will add the appropriate permissions for individual users, so that we have it over with.
	private void loadUserRoles(UserService userService, RoleService roleService) {
		// READ ONLY
		UserMan userReadOnly = userService.getByUsername("UserReadOnly");
		userReadOnly.setRoles(new HashSet<>(Collections.singleton(roleService.get().get(0))));

		// READ & WRITE
		UserMan userWriteOnly = userService.getByUsername("UserWriteOnly");
		userWriteOnly.setRoles(new HashSet<>(Collections.singleton(roleService.get().get(1))));

		// ALL ACCESS
		UserMan admin = userService.getByUsername("Admin");
		admin.setRoles(new HashSet<>(Collections.singleton(roleService.get().get(2))));

		userRepository.saveAll(Arrays.asList(userReadOnly, userWriteOnly, admin));
	}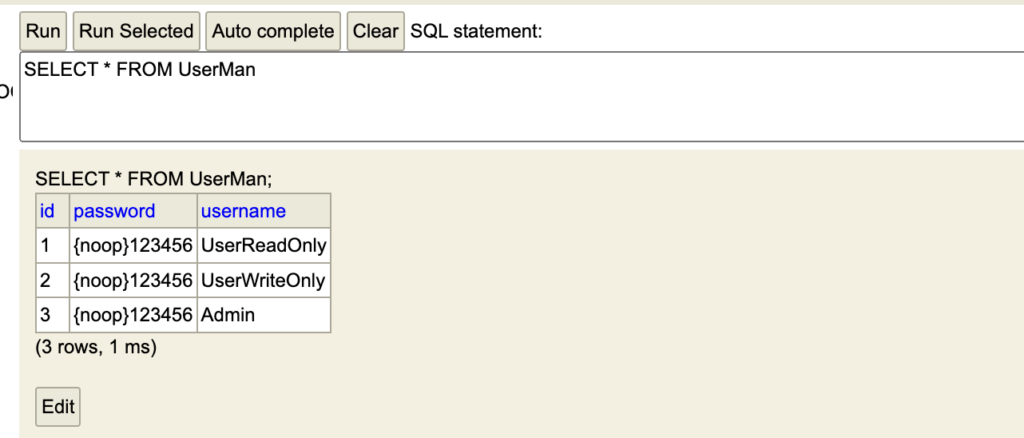
Now let’s think back to our HTTP Basic Auth. Each time when we will try go login – app extracts the username/password combination from the HTTP Basic Auth header in a filter. Then SlykoUserDetailsService fetches specific UserMan from database and wraps it as UserDetails object. At the end of the process, application takes password value also from headers and compare it with the password which is corresponding to UserDetails object. If both match, the user is successfully authenticated. Before we even move on to the main class, I would like to tell you about password hashing. In the form currently created by us, user data is simply transferred in a natural and simple form to the database (and read in the same way). Unfortunately, this carries a great danger in the form of open data that can easily be caught by tracking bots or plugins. To improve it, we will try to add functions that generate appropriate values in the form of hashed words, which are equivalent to our passwords for users.
    @Bean
    public PasswordEncoder passwordEncoder() {
        return new BCryptPasswordEncoder();
    }
Everything what you need to do it only specify one new function annotated with @Bean, so don’t worry – you don’t have to write your own hashing algorithm. After adding it, you still need to remember to change the previously added passwords.
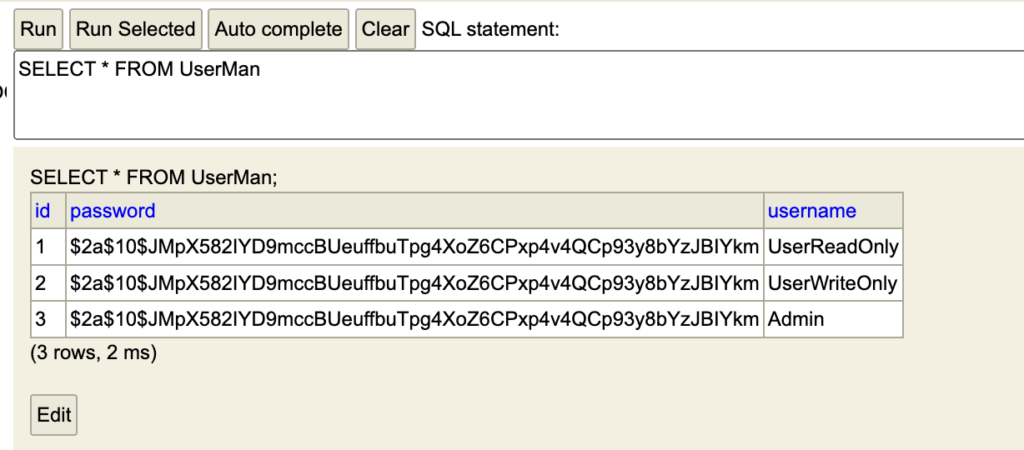
Below you will find the content of the entire configure method for configuring the security of individual endpoints.
    private static final String[] AUTH_WHITELIST = {
            "/login",
            "/api/calc/**"
    };


    @Override
    protected void configure(HttpSecurity httpSecurity) throws Exception {
        httpSecurity
                .authorizeRequests()
                    .antMatchers(AUTH_WHITELIST).permitAll()
                    .antMatchers(HttpMethod.DELETE).hasAnyRole("WRITE", "ADMIN")
                    .antMatchers(HttpMethod.POST).hasAnyRole("WRITE", "ADMIN")
                    .antMatchers(HttpMethod.PUT).hasAnyRole("WRITE", "ADMIN")
                    .antMatchers(HttpMethod.PATCH).hasAnyRole("WRITE", "ADMIN")
                    .antMatchers(HttpMethod.GET).hasAnyRole("READ", "WRITE", "ADMIN")
                    .anyRequest().authenticated()
                .and()
                    .formLogin().permitAll()
                .and()
                    .logout().permitAll()
                .and()
                    .httpBasic();

        httpSecurity.csrf().disable();
        httpSecurity.headers().frameOptions().disable();
    }

    @Override
    public void configure(WebSecurity webSecurity) {
        webSecurity
                .ignoring()
                .antMatchers("/h2-console/**");
    }
We are using an API, so it will be much more convenient to use some client to send requests and receive responses. I recommend using Postman for this purpose. There we will be able to easily transfer user data for authorization.
Security Chain
It’s time to finally tell you about this better change. You will probably agree with me that this introduction was a bit too long, but I had to show you the problem from the very beginning. If you have written applications using Spring Security so far, then this mapping of the situation will surely familiarize you with the problem better.
Let’s assume that our application is already running and installed on the production environment. Due to the requirements of the new client, you need to update the spring version to provide the latest functionalities. As a result, user authorization must also be updated, as application reports may list outdated technologies used in Spring.
Our main patient that we will need to thoroughly check and update is the SecurityConfiguration class, which we have already created. WebSecurityConfigurerAdapter is marked as deprecated in Spring Boot 2.7 and later. If you compile the Spring Boot project, you will get the warning: „The type WebSecurityConfigurerAdapter is deprecated„.
Removing WebSecurityConfigurerAdapter
Firstly, we define the Web Security Config class without extending WebSecurityConfigurerAdapter class and @EnableWebSecurity annotation
// DEPRECATED
@Configuration
@EnableWebSecurity
@AllArgsConstructor
public class SecurityConfiguration extends WebSecurityConfigurerAdapter {

   // ...
}

// NEW
@Configuration
@AllArgsConstructor
public class SecurityConfiguration {

   // ...
}
Export SecurityFilterChain
Now it’s time for declaring SecurityFilterChain instead of using override method configure(HttpSecurity http). Ability to configure HttpSecurity by creating a SecurityFilterChain bean has been introduced in Spring Security 5.4.
// DEPRECATED
    @Override
    protected void configure(HttpSecurity httpSecurity) throws Exception {
        httpSecurity
                .authorizeRequests()
                    .antMatchers(AUTH_WHITELIST).permitAll()
                    .antMatchers(AUTH_ADMIN).hasAnyRole("ADMIN")
                    .antMatchers(HttpMethod.DELETE).hasAnyRole("WRITE", "ADMIN")
                    .antMatchers(HttpMethod.POST).hasAnyRole("WRITE", "ADMIN")
                    .antMatchers(HttpMethod.PUT).hasAnyRole("WRITE", "ADMIN")
                    .antMatchers(HttpMethod.PATCH).hasAnyRole("WRITE", "ADMIN")
                    .antMatchers(HttpMethod.GET).hasAnyRole("READ", "WRITE", "ADMIN")
                    .anyRequest().authenticated()
                .and()
                    .formLogin().permitAll()
                .and()
                    .logout().permitAll()
                .and()
                    .httpBasic();

        httpSecurity.csrf().disable();
        httpSecurity.headers().frameOptions().disable();
    }


// NEW
    @Bean
    public SecurityFilterChain filterChain(HttpSecurity httpSecurity) throws Exception {
        return httpSecurity
                .authorizeRequests()
                    .antMatchers(AUTH_WHITELIST).permitAll()
                    .antMatchers(AUTH_ADMIN).hasAnyRole("ADMIN")
                    .antMatchers(HttpMethod.DELETE).hasAnyRole("WRITE", "ADMIN")
                    .antMatchers(HttpMethod.POST).hasAnyRole("WRITE", "ADMIN")
                    .antMatchers(HttpMethod.PUT).hasAnyRole("WRITE", "ADMIN")
                    .antMatchers(HttpMethod.PATCH).hasAnyRole("WRITE", "ADMIN")
                    .antMatchers(HttpMethod.GET).hasAnyRole("READ", "WRITE", "ADMIN")
                    .anyRequest().authenticated()
                .and()
                    .formLogin().permitAll()
                .and()
                    .logout().permitAll()
                .and()
                    .cors()
                .and()
                    .csrf().disable()
                    .httpBasic()
                .and()
                    .build();
  }
What’s more Spring owners recommend follow best practice by using the Spring Security lambda DSL and the method HttpSecurity#authorizeHttpRequests to define our authorization rules. If you are new to the lambda DSL you can read about it in this blog post. If you wanna just to see how it should look like you can see my snippet code below:
    @Bean
    public SecurityFilterChain filterChain(HttpSecurity httpSecurity) throws Exception {
        return httpSecurity.authorizeRequests((authz) -> authz
                    .antMatchers(AUTH_WHITELIST).permitAll()
                    .antMatchers(AUTH_ADMIN).hasAnyRole("ADMIN")
                    .antMatchers(HttpMethod.DELETE).hasAnyRole("WRITE", "ADMIN")
                    .antMatchers(HttpMethod.POST).hasAnyRole("WRITE", "ADMIN")
                    .antMatchers(HttpMethod.PUT).hasAnyRole("WRITE", "ADMIN")
                    .antMatchers(HttpMethod.PATCH).hasAnyRole("WRITE", "ADMIN")
                    .antMatchers(HttpMethod.GET).hasAnyRole("READ", "WRITE", "ADMIN")
                    .anyRequest().authenticated()
        )
                .formLogin().permitAll()
                .and()
                .logout().permitAll()
                .and()
                .httpBasic(Customizer.withDefaults())
                .build();
    }
Replace public configure() methods
Inside the old class we were extending, there are two additional public configure() methods:
– configure(WebSecurity webSecurity)
– configure(AuthenticationManagerBuilder builder)
As you probably remember – one of them was used for access to the H2 console, so we also need to replace this method with a new version. The WebSecurityCustomizer is a callback interface that can be used to customize WebSecurity
// DEPRECATED
    @Override
    public void configure(WebSecurity webSecurity) {
        webSecurity
                .ignoring()
                .antMatchers("/h2-console/**");
    }

// NEW
    @Bean
    public WebSecurityCustomizer webSecurityCustomizer() {
        return (web) -> web.ignoring().antMatchers("/h2-console/**");
    }
The second method in our code has not been implemented, but for your convenience, you can also see an example of its update below.
// DEPRECATED
@Configuration
@EnableWebSecurity
public class SecurityConfiguration extends WebSecurityConfigurerAdapter {
  ...

  @Bean
  @Override
  public AuthenticationManager authenticationManagerBean() throws Exception {
    return super.authenticationManagerBean();
  }
}

// NEW
@Configuration
public class SecurityConfiguration {
  ...

  @Bean
  public AuthenticationManager authenticationManager(AuthenticationConfiguration authConfiguration) throws Exception {
    return authConfiguration.getAuthenticationManager();
  }
}
Conclusion
Currently, if you want to use WebSecurityConfigurerAdapter, just downgrade Spring Boot to 2.6 or older versions.
I hope this code example was of some help to you. Let me know if you have questions in the comments below.
Happy learning!
Sources
https://spring.io/blog/2022/02/21/spring-security-without-the-websecurityconfigureradapter
https://www.bezkoder.com/websecurityconfigureradapter-deprecated-spring-boot/

28 grudnia, 2022, 10:03 pm
Great article. Do more posts like this with Spring 🙂